Machine Polishing Guide
My paint has lost its shine..
If the paint on your vehicle has lost its shine, dulled in appearance, or looks like a chalky residue has covered the deep colour it had from new, it could be due to the type of paint used on your car.
Single Stage Paint System. (Old Cars)
Single Stage Paint Systems are the original paint system. As the top paint coating, it incorporates both the colour and the protection elements of the finish in the same layer. This is sometimes known as Acrylic Paint Systems. As the protection and the colour are in the same layer, over time, without additional added protection (wax, sealant or coating) this layer can begin to oxidize due to the pigments in the paint drying and fading due to UV exposure. This leaves a dull and chalky finish to the surface. Today, there are only few vehicles manufactures that still employ this paint system. Mostly Solid colour (white fleet cars, blacks, red, yellow cabs, etc) non-metallic finishes of lower priced models.
Clear Over Base Paint System. (Newer Cars)
Clear over Base Paint Systems, known as Clear Coated Finishes utilise a thin, non-protective base colour coat to give the colour with either an additional metallic or pearl finish. On top of this is a protective clear coat. The aim of this layer to; provide additional protection from UV damage that was occurring in Single Stage Systems, allow for a harder & more durable finish, amplify the gloss of the base colour coat. Many European manufacturers have gone an extra step to increase the durability of the clear layer of coating. A new system was developed to allow an additional coat of harder, ceramic based paint to be sprayed over their conventional clear. This micro thin layer of coating is almost double the hardness of the underlying paint and provides greater resistance to marring and wear from chemicals. When a clear coated vehicle is dull or faded in appearance, this is not generally due to oxidization, however they may be a layer of bonded dirt, fallout and grime on the surface that is known as contamination. This will have to be removed using Decontamination products such as Detailing Clay and other condition specific products. Dullness or fading of the paint finish on a clear coated vehicle is caused by the reflection of light off scratches. When there are no scratches in the finish the light with reflect back directly showing the colour of the finish. When the light hits a scratch, which is an angled indent into the paint, refracts the light in different directions, therefore looking dull.
What paint does my car have? Is it hard or soft?
There is a great difference in the hardness of paints, which vary from Manufacturer. However the biggest difference is generally between the origins of manufacture.
To simplify can be placed in to three groups.
- Asian Manufactured Vehicles – Generally to softest of paint systems used
- American & Australian Manufactured Vehicles – A step above the Asian vehicles in hardness
- European Manufactured Vehicle – Known as the hardest paint types. Whether these vehicles have a ceramic layer or not, the paint surface is extremely hard.
What is a scratch & how do I fix it?

As we talked about earlier, a scratch is an indentation into the paint. This can be a minor indentation known as marring or washing swirls, on visible in direct sunlight. Medium indentations known as medium swirls, light cob webbing or light scratches. Heavy indentations known as heavy cob webbing, heavy swirls & scratches. To remove a scratch, you have to remove or level the paint down past the level of scratch. We call this Paint Correction. We then refine the surface by stepping down to a less aggressive combination of products to remove any micro marring caused by the previous step. This is called Paint Enhancement.
So know we know how to determine what type of paint system was used on our car. An understanding of the hardness of our paint, which can help us determine the type of product combinations we require and finally what a scratch is and how to tell how deep it might be, therefore an indication of the types of products we might require to perform the Paint Correction & Enhancement steps.
Machine Polishing VS Hand Polishing
So why is machine polishing even necessary? Isn’t hand polishing safer? While this is partially true in the sense that you are extremely unlikely to burn through your vehicles paint when using hand polishing, the reality is that hand polishing is actually far more likely to cause micro marring, hazing and swirling in your vehicles paint, which is the total opposite of what the process of polishing is trying to achieve.
So what is a swirl? They have many names and come in all shapes and sizes! Some people refer to them as spider webbing or sun reflections and others cannot see them at all without having them specifically pointed out.
In order to remove a defect, we first need to be able to identify what one is and how it was caused. Swirl marks are primarily caused by friction on the vehicles paint, this can come in the form of washing or hand polishing the vehicle, slight contaminants introduced into the wash pad or polishing pad can cause hundreds of thousands of fine scratches in a uniform pattern consistent with how you moved the implement over the vehicle.
As most people are taught to wash and polish using circular movements, these marks then appear as a vortex of swirls under sunlight. Only machine polishing will effectively remove these defects, as the heat and friction required can only be produced by a machine’s torque.
This is where many people shy away from machine polishing as it’s viewed as a dangerous method that can lead to over removal of paint from the vehicle. In days gone past, this was a valid concern however technology has progressed to a point where machine polishers have adapted to the types of thickness automotive manufacturers are finishing their vehicles with, and as such the enthusiast can safely remove these defects with the right product and machine at their disposal.
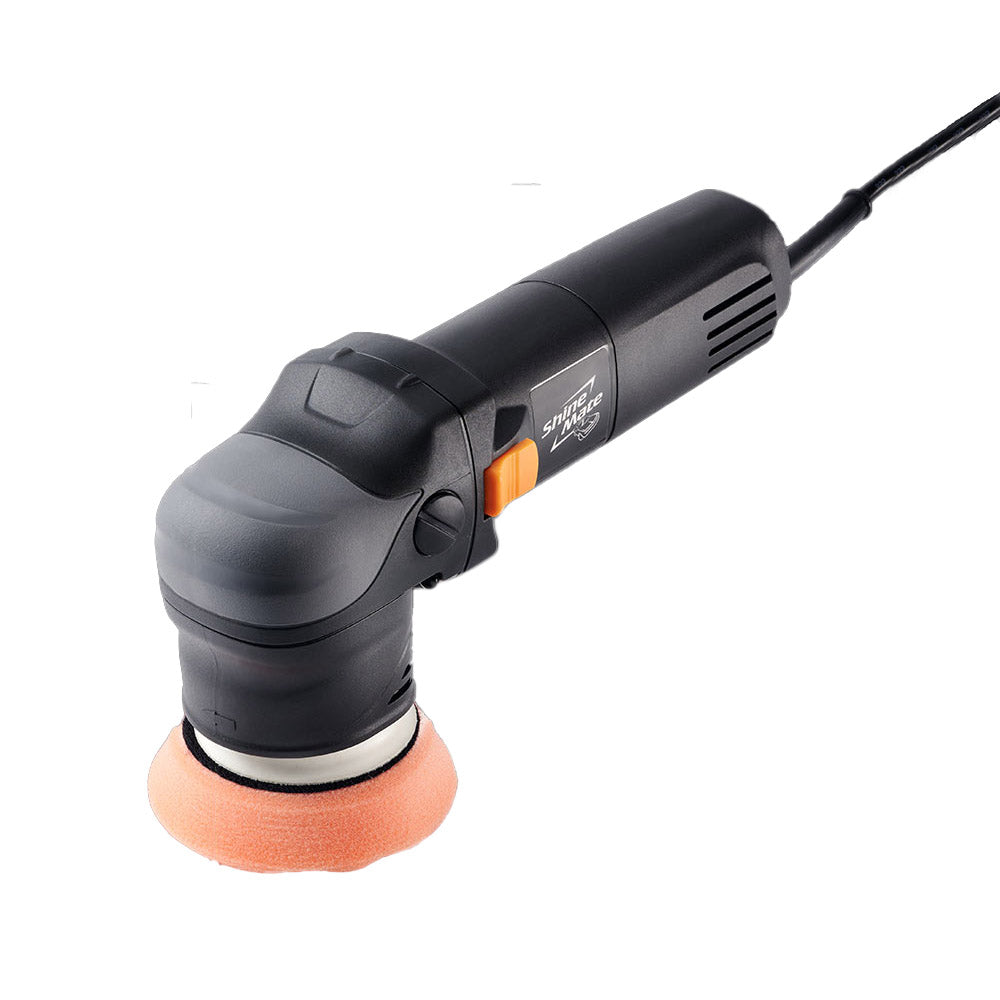
How the shine mate system of machines work is the use of a random orbit in addition to the circular rotation of the machines backing plate. This safely dissipates heat and friction over a larger surface area to avoid compromising the paints thickness yet still allow removal of defects that would otherwise cause your vehicle to lose it’s gloss as it stops light from reflecting the colour.
And with the confidence of a 18 month warranty backing the machine in case of failures, as well as a full complement of replacement parts and in-house repair team, you can rest assured your machine will stay relevant for years to come whether you use it every weekend or just the once to correct your vehicle. 5 Reasons Shine Mate polishers are the safest and most reliable choice
- With all the features you would expect of a modern polisher such as soft start, automatic hold, full spectrum 6 speed adjustable torque, ergonomic design, efficient cooling for both pad and machine body and an extremely efficient speed stabilising power delivery system that ensures every single watt of energy the machine produces is translated into correction power on your panel, you can expect professional level results in quick time and minimal wear and tear on consumables such as pads.
- Shine Mate pad designs are world class and exceptionally durable, in fact we don’t think you could find a machine currently on the market that is as gentle on pads as these. Pads are not cheap, and to get maximum performance cost ratio out of them they need to be married to a machine that without compromising it’s defect removing performance also doesn’t trade that off with a quicker consumption of pad material.
- If you are going to undertake the 15+ hour task of a full vehicle paint correction, you are going to want to be as comfortable as possible while doing it. The shine mate’s are exceptional in this department, with balance being paramount in order to reduce user fatigue during extended hours of operation.
- The shine mate machines are industry leaders in cost/performance ratio. The metric by which all professional detailers judge the viability of the equipment they use in order to be profitable enterprises.
- Reliability is the cornerstone of the shine mate range, without it cost and performance would be irrelevant. For this reason shine mate machines are backed by a fix or replace 16 month warranty.
Priming the pad & Setup
- Attach the buffing pad to the attached backing plate, trying to centre the pad on the backing plate as accurately as possible.
- When using a dry fresh pad for the first time, apply 10 pea sized dots of compound to pad and spread it in to the pad surface so as to fully cover the surface of the pad. This is called priming the pad. If you need to add more compounds, do so. Your aim is for the pad to be covered with product and damp to touch, however not a thick coat of compound. You may want to spur your pad with a brush to remove any excess compound.
- Now apply 2-3 half pea sized drops onto the pad surface. This is your ‘working compound’ that will be used to remove the imperfections in you paint finish.
- When first learning to use the Concours 900, set out area to be polished approximately the same in size to a Microfibre Cloth 40x40cm. You can lay a cloth on a panel for a reference.
- Place the pad onto the panel.
Paint Correction Stage
- Set the speed of the polisher to 2 and turn the machine on.
- Apply only enough downwards pressure on the head of the machine to hear a change in sound, without squashing the pad. The pad and backing plate should be level with the panel at all times.
- Work left to right in a snaking downward pattern, overlap the previous polished line by 50% of the pad size, and then work your way back up to your starting point. Move the polisher at a speed of approximately 6-7 seconds per 40cm. This is called ‘A Pass’.
- Turn off the machine while the pad is still on the panel.
- Set the speed to 3-3.5 if removing defects such as scratches and swirls, and speed 3 when performing a finishing step.
Polishing Time
- Place the pad back on to the panel and turn on the machine. Attempt to keep the pad as parallel to the surface as possible with only enough pressure keep the pad level.
- Now perform another 4-5 Passes as before this time when you finish your first pass, perform the same technique but instead of in a horizontal direction, change to a vertical one. Once you have completed the 4-5 passes, vertical and horizontal across the panel, turn of the machine and use a good quality microfiber cloth to remove the residue.
- Give the pad a quick brush with a Scholl Concepts Pad Cleaning Brush to remove any dried compound, then turn the machine on and give the pad another light brush.
- Continue on to the next section, the pad is primed apply only 4-5 half pea sized drops to the pad.
- Repeat the PAINT CORRECTION STAGE


